How to Actually Clean the Black Rubber Seal on Your Washing Machine (And Stop Mould Returning)
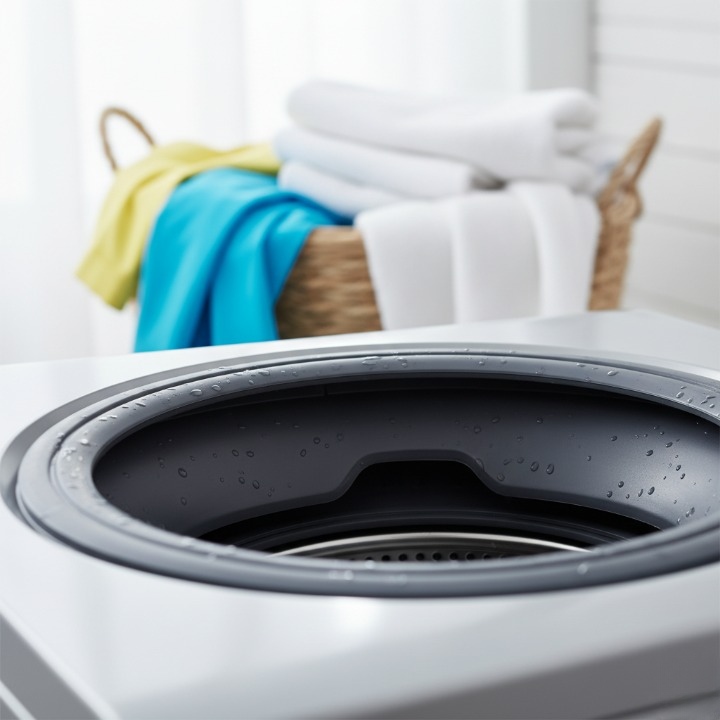
We’ve all been there. You open the washing machine to put in a load, and instead of a fresh drum, you’re hit with that damp, musty smell. You pull back the rubber seal, and there it is: a grim, slimy ring of black mould.
This is a problem for millions of UK owners of front-loading washing machines. That black gunk is a nasty combination of soap scum, shed lint, trapped hair, bacteria, and (most stubbornly) black mould. If you’ve tried just wiping it, you know it comes back, often worse than before.
This comprehensive, step-by-step guide will show you how to safely and effectively clean the black mould and grime from your seal, what products to use (and which to avoid), and the expert-backed routine to prevent it from ever coming back. We’re not just wiping the surface; we’re killing the problem at its root.
Why You Must Clean Your Washing Machine Seal (It’s Not Just a Stain)
That black ring on your door gasket isn’t just an ugly mark. It’s an active problem that can affect your health, your clothes, and the lifespan of your machine.
The “Black Stuff” Explained: Mould vs. Mildew vs. Grime
To win the battle, you need to know your enemy. What you see is likely a mix of three things:
- Grime: This is a build-up of soap scum (from detergent and fabric softener), lint, and general debris. It’s often slimy but is the easiest part to clean.
- Mildew: This is an early-stage surface fungus. It’s powdery or downy and usually grey or white. Think of it as the advance warning for…
- Black Mould: This is the living fungus. It’s slimy, black or dark green, and penetrates into the rubber. This is what causes the deep stains and the persistent musty smell. You can’t just wipe mould away; you have to kill it.
Health, Odours, and Stains: The Risks of Ignoring the Gunk
Ignoring the build-up is a bad idea. That mould and bacteria will transfer to your “clean” laundry, giving it that damp, “never quite dry” odour.
Worse, the bad odours are a sign that the mould is releasing spores into the air every time you open the door. This can be an irritant for many, especially those with allergies or respiratory issues. Finally, if left for too long, the black mould will permanently stain and even begin to eat away at the rubber, leading to cracks and leaks.
My Go-To Cleaning Kit: What You’ll Need for the Job
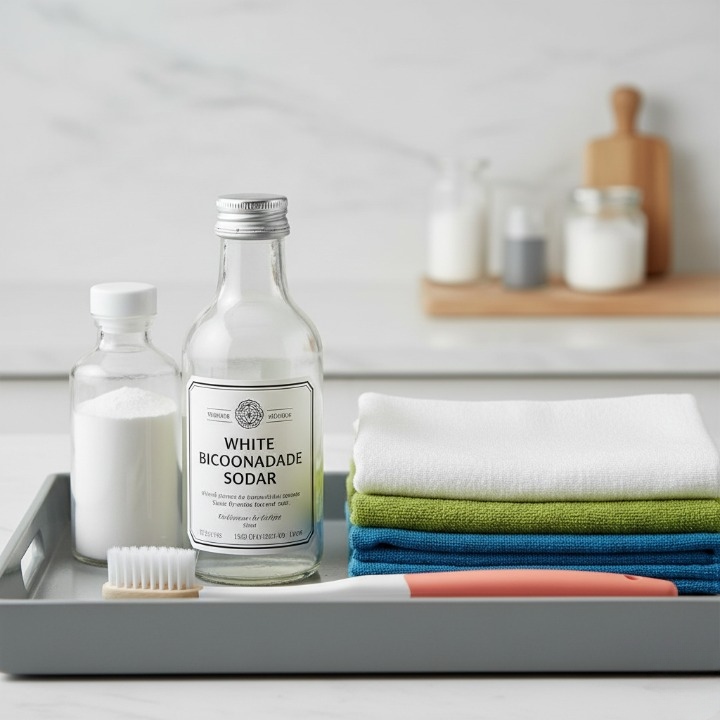
As a homecare expert, I’ve tackled this job dozens of times. A lot of guides overcomplicate this; in my experience, you only need a few simple items. Here’s the exact kit I keep on hand.
The Natural Method (My Preferred First Step)
- White Vinegar: Its acetic acid is brilliant at killing mould spores and dissolving soap scum.
- Bicarbonate of Soda (Baking Soda): A gentle abrasive that deodorises and helps lift grime.
- Microfibre Cloths: Get a pack of white or old ones. You don’t want to use new, coloured cloths, as cleaning agents can make the dye run and stain your seal.
- An Old Toothbrush: This is my non-negotiable tool. It’s the only thing that truly gets into the deepest folds and crevices of the seal.
The Heavy-Duty Method (For Stubborn, Set-In Mould)
- A specialist mould or mildew remover (a gel is often better than a spray).
- OR: A carefully diluted chlorine bleach solution (but please read the crucial warning on this below before you even think about using it).
Essential Safety Gear
- Rubber Gloves: A must. These cleaning solutions are harsh on the skin.
- Goggles: I strongly recommend these, especially if you’re using a mould spray or bleach. You do not want splashes in your eyes.
- Good Ventilation: Open a window or turn on an extractor fan.
How to Clean the Black Rubber Seal on Your Washing Machine: A Step-by-Step Walkthrough
Ready? Let’s get this done. I’ll walk you through my exact process. This is the step-by-step guide I follow every time.
Step 1: Safety & Prep (My “Dry Wipe” First)
Before I get anything wet, I put on my rubber gloves and goggles.
First, I do a “dry wipe.” I take a dry microfibre cloth (or paper towel) and run it all around the seal, pulling back the folds. The goal here is to remove any loose lint and debris, hair, or even the odd coin. You’d be surprised what you find in there. This stops you from just turning that debris into a wet paste later.
Step 2: The First Clean (Choosing Your Solution)
I always start with the natural method. It’s safer for you, the machine, and the environment.
I make a paste with bicarbonate of soda and a little water. Using my gloved fingers or the toothbrush, I apply this paste all over the visible mould and grime. Then, I spray it with white vinegar from a bottle. It will fizz—this is the chemical reaction that’s actively lifting the grime.
Alternatively, just spray the entire seal with undiluted white vinegar and let it sit for 10-15 minutes.
Step 3: The Deep Scrub (Getting Inside the Folds and Crevices)
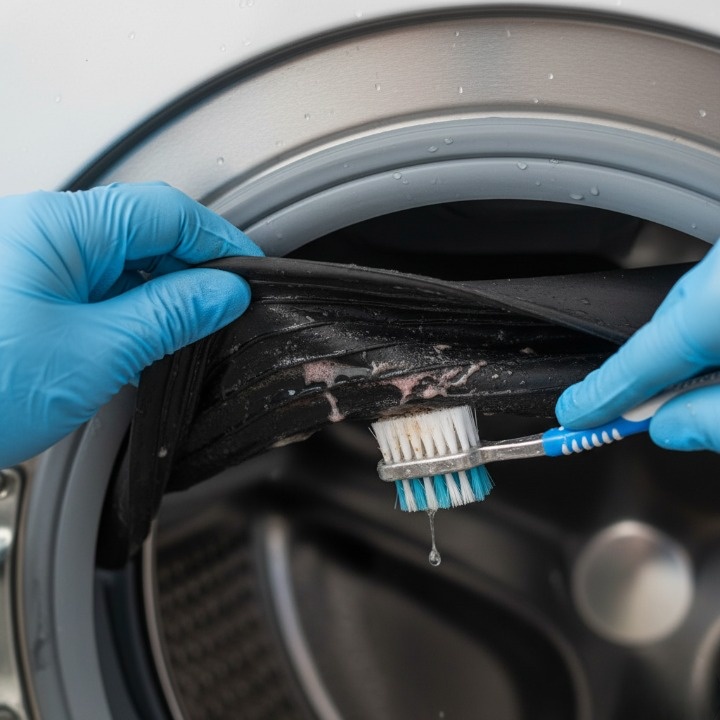
This is the most important part. Don’t just wipe the surface. This is where the old toothbrush earns its keep.
[PRO-TIP]
Don’t just wipe the surface. The real enemy hides under the main lip of the gasket. Gently pull the fold back with one hand while you scrub inside that deep groove with the old toothbrush. This is the spot everyone misses and where 90% of the mould lives. Work your way around the entire seal, scrubbing firmly. You’ll see the black gunk lift onto the bristles.
Step 4: The “Soak” (For Set-In Grime)
If the stains are still stubborn after scrubbing, it’s time for a targeted soak.
Soak a long strip of microfibre cloth or a few paper towels in your white vinegar. Carefully wedge these soaked cloths deep into the main fold of the seal, ensuring they are in full contact with the stained areas.
Leave them there for at least 30 minutes, or up to an hour. This lets the vinegar work deep into the mould.
Step 5: Rinse, Dry, and Run a Maintenance Wash
Remove the soaked cloths. Take a fresh, damp cloth and wipe down the entire seal, removing all the vinegar, bicarb, and dislodged gunk.
Now, dry the seal thoroughly with a clean, dry cloth. Get right back into those folds.
Finally, to clear out any remaining spores from the drum and pipes, run an empty maintenance wash. Use the hottest cycle your machine has (ideally a 90°C wash). Add a cup of white vinegar or a specialist Dettol Washing Machine Cleaner directly into the drum. This rinses away any lingering cleaning solution and sanitises the whole system.
The “Bleach” Debate: A Crucial Warning for UK Homeowners
This is the single most important piece of advice in this article. Many online guides will tell you to just nuke the mould with chlorine bleach. As an expert, my advice is to be extremely careful.
What Some Guides Say vs. What Manufacturers (Like Bosch) Warn
While bleach does kill mould, it can be a disaster for your washing machine.
I’ve seen it happen: the harsh chlorine can degrade the rubber, making it brittle and causing it to crack over time. This turns a simple cleaning job into a costly repair to replace the entire gasket.
Don’t just take my word for it. Go and find your machine’s manual. Many manufacturers explicitly warn against using it. For example, Bosch’s official support documentation clearly states not to use “cleaners that contain chlorine,” as they can damage the seal. [Bosch Home Appliance Support]
CHECK YOUR MANUAL. Using chlorine bleach on your door gasket may degrade the rubber and could void your warranty. Always check your manufacturer’s specific advice before using harsh chemicals. If you are a renter, this is especially important, as you could be liable for the damage.
A Safer Alternative? Oxygen Bleach vs. Chlorine Bleach
If you’ve tried the vinegar method multiple times and the mould is still actively growing (not just staining), you might consider a bleach alternative.
A non-chlorine (oxygen-based) bleach is much gentler on the rubber. However, the natural vinegar/bicarb method is always the safest first step. If that fails, I recommend a specialist, non-chlorine mould remover before you ever reach for the chlorine bleach.
What If the Black Stains Don’t Come Off? (Expert-Level Fixes)
This is the most common frustration I hear. You’ve scrubbed, you’ve soaked, the musty smell is gone… but a few black stains remain.
Understanding Mould Staining (Why Scrubbing Doesn’t Work)
If you’ve followed the steps, the mould is dead. The smell is gone, and it’s no longer a health risk. What you’re left with is a cosmetic stain where the fungus has pigmented the rubber itself.
At this point, more scrubbing won’t help. You’re not fighting a living thing anymore; you’re fighting a dye.
How to Use Specialist Mould Remover Gels for Cosmetic Stains
This is where specialist products have their place. Instead of a spray (which runs everywhere), I’ve had real success with thick mould remover gels.
These are often sold for removing mould from bathroom tile grout. Because they are a gel, you can apply a thick, precise bead directly onto the black stain inside the seal and it will stay put. It clings to the surface, allowing the active ingredients (which are often a gel-stabilised bleach) to work on the stain for several hours without you needing to soak the whole seal.
Apply it with your toothbrush, leave it for the time specified on the bottle, and then wipe it away thoroughly before running a rinse cycle. Safeguard Europe Mould Remediation
When to Call a Professional (Or Replace the Seal)
Be realistic. If the rubber seal is cracked, warped, sticky to the touch, or the mould is simply too embedded after all these attempts, no amount of cleaning will save it.
At this point, the seal’s integrity is compromised. It’s time to stop cleaning and look up a replacement door gasket for your machine’s model.
How to Prevent Mould Growth (My Simple Weekly Routine)

You’ve done the deep clean. Now, let’s make sure you never have to do it again. Preventing mould is 100% about habit. This simple routine is all it takes.
Tip 1: Leave the Door and Drawer Open After Every Wash
This is the #1 most important tip. It costs nothing and is 90% of the battle. Mould thrives in dark, damp environments. As soon as you empty the last load, leave the door open just an inch. Do the same for the detergent drawer. This allows air circulation to completely dry the drum and seal. Whirlpool Appliance Maintenance Tips
Tip 2: Wipe Down the Seal and Glass (The 30-Second Fix)
This is my personal “end of day” habit. After the last load of the week, I take 30 seconds to wipe down after each use. I use an old, dry microfibre cloth and quickly wipe the inside of the door glass and the folds of the rubber seal. This removes the moisture and soap scum before it has a chance to build up.
Tip 3: Clean Your Detergent Drawer and Drain Filter Monthly
Mould doesn’t just grow in the seal. It loves the gunky, undissolved soap build-up in your detergent drawer and the sludge in your drain filter. I clean mine on the first of every month. Pull the drawer out completely, scrub it in the sink, and (after laying down a towel) drain and clean the filter at the bottom of the machine.
Tip 4: Run a Monthly 90°C Maintenance Wash
Once a month, run a hot cycle (90°C) with the machine empty. This is your monthly sterilisation. Add a cup of white vinegar or a specialist cleaner (like those from Dettol) to the drum to kill any unseen bacteria and flush the system.
FAQs (People Also Ask)
What is the black stuff on my washing machine rubber seal?
The black stuff is a combination of grime (lint, soap scum, hair) and, most often, black mould (a fungus) or mildew. It’s caused by the warm, damp, and dark conditions inside the seal after a wash.
Can you use bleach to clean the black mould on a washing machine seal?
You can, but I strongly advise against it as a first step. Chlorine bleach can be very harsh, degrading the rubber over time and potentially voiding your manufacturer’s warranty. Always check your manual. A safer first choice is white vinegar and bicarbonate of soda.
Does white vinegar kill mould on a washing machine seal?
Yes. White vinegar contains acetic acid, which is effective at killing mould and mildew spores. It also helps to dissolve the soap scum and grime that the mould feeds on.
How do I get rid of the musty smell in my front-loading washer?
The musty smell is caused by the mould and bacteria in the seal, drum, and filter. To get rid of it, you need to clean the seal thoroughly (using the steps above), clean your detergent drawer, clean the drain filter, and run a 90°C maintenance wash with a cup of white vinegar.
Can I use bicarbonate of soda to clean the rubber seal?
Absolutely. Bicarbonate of soda (baking soda) is a fantastic, gently abrasive cleaner and a natural deodoriser. It’s perfect for scrubbing away grime and mildew without damaging the rubber.
How often should I clean my washing machine seal?
I recommend a quick “wipe down” after every laundry day. You should perform a deep scrub (like the one in this guide) at the first sign of mould or smell, or as a preventative measure every 2-3 months.
Why does my front-loading washing machine seal get so mouldy?
Unlike top-loaders, front-loading machines have an airtight, watertight door. This design traps moisture, soap scum, and lint in the deep folds and crevices of the rubber gasket, creating the perfect breeding ground for mould.
Can a mouldy washing machine seal be saved, or does it need replacing?
Most can be saved! If the mould is just on the surface or in the folds, a deep clean will solve it. However, if the seal is physically damaged (cracked, warped, brittle) or the mould staining is completely permanent and unacceptable to you, it will need to be replaced.
Take Back Your Fresh Laundry
Tackling the black mould in your washing machine seal doesn’t have to be a losing battle. By correctly identifying the problem (grime vs. mould vs. stain), using the right cleaning method, and—most importantly—following a simple prevention routine, you can banish the musty smells for good.
From my experience, the key is consistency. A 30-second wipe-down today is far better than a 30-minute deep scrub next month. Your machine will last longer, and your laundry will smell genuinely fresh.
What’s your biggest cleaning challenge? Check out our other expert home-cleaning guides to tackle grime in the kitchen, bathroom, and beyond.