How to Fit Artificial Grass: The Expert UK DIY Guide (2025)
Tired of muddy patches, endless mowing, and a lawn that just won’t behave? You’re not alone. That’s why searches for “how do I fit artificial grass” are soaring across the UK. It promises a perfect, low-maintenance garden all year round.
But let’s be honest: the task can feel daunting. A bad installation, with its lumpy sub-base and visible seams, looks worse than the original lawn. From my experience, the difference between a “DIY disaster” and a “professional finish” comes down to one thing: preparation. Get the base right, and the rest will follow.
In this comprehensive 2025 guide, I’ll walk you through the exact professional method, step-by-step. We’ll cover everything from building a rock-solid base to flawlessly joining seams, ensuring your new lawn is the envy of the neighbourhood for years to come.
Before You Start: Planning, Tools & Materials
Proper planning is the most important step. Rushing to buy materials without a clear plan is the first mistake. Before you dig a single spadeful, let’s get organised.
The “Hire vs. Buy” Tools List
You don’t need a professional’s full van, but you do need the right tools. Some you’ll buy, and some you absolutely must hire.
- To Buy:
- A heavy-duty Stanley knife (and lots of spare blades)
- Thick work gloves
- Tape measure
- Spade (for digging)
- Shovel (for moving aggregate)
- Wheelbarrow
- A stiff yard broom
- A long, straight piece of timber (for screeding)
- Spirit level
- Hammer and galvanised nails/screws
- Caulking gun (for adhesive)
- To Hire:
- Turf Cutter: For large or established lawns, this will save you a full day of back-breaking work.
- Vibrating Plate Compactor (or “Wacker Plate”): This is non-negotiable for a professional job. You cannot compact a sub-base properly by foot or with a hand tamper. Hiring one for a day is the best money you will spend.
Choosing Your Materials: What is MOT Type 1 vs. Granite Dust?
This is where many DIY guides go wrong. A stable base has two distinct layers, not one.
- The Sub-Base (for stability): This is your load-bearing layer. The industry standard, as recommended by major UK suppliers like Jewson, is MOT Type 1. This is a crushed aggregate (usually 40mm down to dust) that locks together when compacted, creating a solid, free-draining foundation.
- The Laying Course (for smoothness): This is the thin, fine layer that goes on top of the sub-base. It creates the perfectly smooth “screed” for your grass. The best materials are 6mm granite dust (or “grano”) or sharp sand. Never use builder’s sand, as it’s too soft and will hold water.
How to Measure and Order Your Artificial Grass
Measure your area carefully in metres. Remember to measure the widest and longest points, even if the lawn is an irregular shape, as your grass will come in a rectangular roll (usually 2m or 4m widths).
Common Mistake: Always order 10% more grass than your area to allow for cuts and wastage. Crucially, if you need more than one roll, check the pile direction on all of them. The “pile” is the way the grass fibres lean. If you lay two pieces with opposing pile directions, they will look like two completely different colours. This is the #1 rookie error, and it’s unfixable.
Step 1: The Excavation (Removing Your Old Lawn)
This is the most physically demanding part. If you hired a turf cutter, this will be fast. If not, put on your gloves and get digging.
How Deep to Dig for Your Artificial Grass
Your aim is to dig to a consistent depth across the entire area.
For a standard garden lawn, aim for an excavation depth of 75mm to 100mm.
This depth allows for a 50mm compacted sub-base (MOT Type 1), a 25mm compacted laying course (granite dust), and the height of the grass pile itself, leaving the final level perfect.
Installing Your Edging (A Solid Perimeter)
You must install a solid perimeter before adding your sub-base. This edging acts as a retainer to hold the entire base in and provides a solid edge to fix your grass to.
Treated timber (like 2×2 or 4×2 beams) or a composite edging system works perfectly. Fix the edging in place with stakes, ensuring the top is level and sits at the desired final height of your lawn.
Step 2: The “Secret” to a Pro Finish – The Two-Layer Base
This is the step that separates the professionals from the amateurs. A lumpy, uneven lawn is always the result of a poorly prepared base. Do not cut corners here.
Layer 1: The Sub-Base (Using MOT Type 1)
- Move your MOT Type 1 into the excavated area with your wheelbarrow.
- Spread it out evenly with a shovel and rake to a depth of about 50-60mm.
- Now, take your vibrating plate compactor. Go over the entire area at least 3-4 times, in different directions. You will see the aggregate lock down and become solid.
- The final compacted layer should be around 50mm deep. As the British Association of Landscape Industries (BALI) confirms, a stable, well-drained foundation is critical to the performance of any landscaped surface.
Layer 2: The Laying Course (Using Granite Dust or Sharp Sand)
- Spread your granite dust or sharp sand over the compacted MOT Type 1 to a depth of about 30mm.
- This is your smoothing layer. Take your long, straight piece of timber.
- Resting the timber on your perimeter edging, “screed” the surface by dragging the timber across the sand in a sawing motion. This scrapes off the high spots and fills the low spots.
- Once it’s perfectly smooth and flat, use your wacker plate again for one or two final, light passes to compact it. Your final laying course should be around 25mm deep.
Troubleshooting: Why is My Base Bumpy?
If your base is lumpy, I can tell you from experience it’s one of two things. You’ve either used the wrong aggregate (like 20mm shingle, which just rolls around) or, more likely, you failed to compact it properly with a wacker plate. A hand tamper won’t do it. If it’s not level now, your lawn will never be level. Re-screed and re-compact until it’s perfect.
Step 3: Laying the Weed Membrane
The geotextile weed membrane stops weeds from growing up from the soil, but it also stabilises your laying course. However, there is one critical exception.
Pro-Tip for Pet Owners (E-E-A-T): Are you fitting this grass for dogs? If so, do NOT install a weed membrane on top of your sand/granite.
High-experience, BALI-accredited suppliers like NeoGrass warn that this top membrane traps urine, creating a foul smell that’s almost impossible to clean. For pet installations, we recommend only one membrane at the very bottom of the excavation (on the soil, before the sub-base) to block weeds while allowing maximum drainage.
How to Install the Geotextile Membrane
For non-pet lawns, roll the membrane over your smooth, compacted laying course.
Overlap any joins by at least 300mm. You can secure it to your timber edging with a few galvanised nails or staples to stop it from moving.
Step 4: Rolling Out & Acclimatising Your Grass
This is the exciting part, but don’t rush. Your grass has been tightly rolled for transport.
Common Mistake: Not letting the grass ‘acclimatise’. According to expert installers Artificial Grass GB, you must unroll your grass and let it lie flat for at least 2 hours (preferably 24 hours if you can) before fitting.
This allows any creases from transport to drop out. It also lets the material adjust to the ambient temperature, preventing it from ‘shrinking’ or ‘expanding’ after you’ve already cut it to size.
Understanding “Pile Direction” (The Easiest Mistake to Make)
As you roll out your grass, remember your pile direction. Make sure all your pieces ‘point’ in the same direction.
For the best look, the pile should lean towards the main viewing angle (e.g., facing your house or patio). This reflects the light better and gives the richest, most natural colour.
Step 5: How to Cut Artificial Grass (The Final Trim)
Once your grass is in position and acclimatised, it’s time for the final trim.
- Always use a new, sharp Stanley knife blade. A dull blade will snag and tear the backing.
- Fold the grass back where it meets your edging.
- Carefully cut from the black latex backing, not from the green-bladed top. This gives you a clean cut and avoids trimming the grass fibres.
- Take your time. Cut in small, accurate strokes, checking your line constantly. You can always trim more off; you can’t add it back on.
Step 6: How to Join Artificial Grass Seams (The Hard Part)
From my experience, this is the step every DIYer dreads. Get this right, and your lawn will look professional. Get it wrong, and it’s all you’ll ever see. Be patient.
Preparing Your Seam for a Professional Join
- Lay your two pieces of grass side-by-side, ensuring the pile direction is identical.
- The factory edges are not always perfectly straight. To get an invisible join, you need to create your own.
- Fold back both edges. From the back of the grass, carefully cut off 2-3 tufts (about 3-5mm) from the edge of both pieces. This creates a clean, factory-cut edge to join.
- Bring the two new edges together to check the fit. They should “butt up” perfectly without overlapping. The gap should be 1-2mm at most.
Applying Joining Tape and Adhesive
- Once you’re happy with the fit, fold both edges back again.
- Lay your joining tape (shiny side down) on the sub-base, so it’s centred under the gap.
- Using your caulking gun, apply the artificial grass adhesive in a large zigzag pattern along the tape.
- Carefully press one side of the grass onto the glue. Then, just as carefully, press the other side down, butting it up against the first.
- Do not overlap the grass.
- Walk along the seam to press the backing into the adhesive. Ruffle the pile with your fingers to blend the fibres and hide the join.
- Finally, weigh the seam down with heavy planks or bags of sand while the adhesive cures (check the manufacturer’s time, usually 2-3 hours).
Step 7: Securing the Perimeter & Applying Infill
You’re on the home stretch. The final step is to fix the edges and apply the infill.
Fixing the Grass (Nails vs. Glue)
How you secure the perimeter depends on your edging.
- For timber edging: Use 40mm galvanised nails or flat-head screws. Fix them every 200mm (8 inches) around the entire edge, hammering them down into the pile so they disappear.
- For concrete or patio edges: Apply a bead of your artificial grass adhesive to the concrete and press the grass backing firmly into it.
Why You Must Use Infill (Kiln-Dried Sand)
This is the “secret” step that most DIYers skip, but it’s essential for a long-lasting lawn. Brushing kiln-dried sand (a very fine, specialist sand) into your grass is not optional.
- It adds weight to the grass, preventing any lifting or ripples.
- It protects the latex backing from UV rays, extending its life.
- It helps the grass fibres stand up and gives a more natural, resilient feel. Even the 2025 FAW guidelines for professional pitches stress the importance of infill for pile stability.
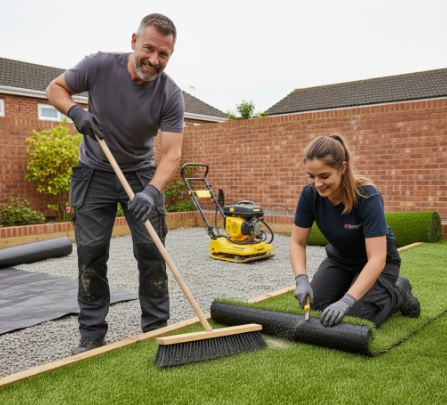
To apply it, scatter the sand evenly over the dry grass. Then, use your stiff yard broom to brush the sand deep into the pile. You must brush against the pile direction to help the blades stand up and let the sand fall to the bottom.
What About Fitting Artificial Grass on Concrete or Decking?
Wondering how to fit artificial grass on a hard surface like a patio or old decking? This is a much easier and faster process, as the “hard” work of the sub-base is already done.
The key is to ensure the surface is clean, stable, and has good drainage. For concrete, you may need to drill drainage holes first.
You should always use a shockpad (a foam underlay) when installing on a hard base. This prevents the grass from feeling unnaturally hard underfoot and gives it a softer, more realistic feel. Simply glue the shockpad to the concrete, then glue the grass to the shockpad.
FAQs
How deep should the sub-base be for artificial grass?
For a typical UK garden, a total compacted base of 75mm is ideal. This is made of a 50mm sub-base (MOT Type 1) for stability and a 25mm laying course (granite dust) for a smooth finish.
What is the best thing to lay under artificial grass?
A two-layer system is best: a compacted sub-base of MOT Type 1, topped with a compacted laying course of granite dust or sharp sand. A weed membrane is laid on top (or underneath for pet owners).
Do I really need a sub-base for artificial grass?
Yes. Do not skip this. Laying grass directly on soil will result in a lumpy, sinking, and waterlogged lawn within months. The sub-base provides the stable, level, and free-draining foundation it needs to last.
What is the cheapest way to lay artificial grass?
The cheapest way is to do it yourself. You can also save money by using sharp sand for the laying course instead of granite dust (it’s often slightly cheaper) and by collecting the hired tools (wacker plate, turf cutter) yourself instead of paying for delivery.
Can I just lay artificial grass on soil?
No. Never lay artificial grass directly onto soil. The soil will shift and settle, creating lumps and dips. It will also become waterlogged in winter, and weeds will grow straight through.
What happens if you don’t put sand on artificial grass?
If you don’t use kiln-dried sand infill, your grass will be more likely to lift or ripple. The blades will flatten over time and won’t stand up as well, and the backing will be more exposed to UV damage, shortening the life of your lawn.
How long does it take to fit artificial grass?
For an average-sized (50m²) garden, a DIY installation is a 2-day job. Day 1 is for excavation and installing the sub-base. Day 2 is for laying the grass, cutting, seaming, and applying infill.
Is it better to use sharp sand or granite dust?
Both work well for the laying course. Granite dust (grano) is often favoured by professionals as its fine particles compact to an almost concrete-like hardness, making it less likely to be disturbed by pets or burrowing insects. Sharp sand is a perfectly good and often cheaper alternative.
Your Perfect Lawn, Built to Last
Fitting artificial grass is a significant DIY project, but it’s one you can get right. Success doesn’t come from the grass itself, but from what’s underneath: a rock-solid, two-layer sub-base, perfectly level.
From my experience, the time you spend on the sub-base and painstakingly lining up your seams is what you’ll thank yourself for later. Don’t rush the ‘boring’ bits—they are the only bits that matter for a 10-year professional finish.